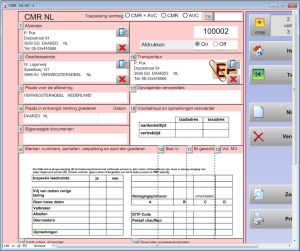
You can print boxes or logos in the spaces on the form. The figure opposite is an example.

A consignment note should be an invitation to record information which is necessary for correct administrative processing.

Data input boxes clearly indicate which information is required.
Such as the temperature of the load.


The form layout:
PrintCMR allows you to create a total layout for the consignment note.
In other words, all the boxes that are made available on the consignment note are included in a single design.
The demo data includes a CMR design with provisions for 3 logos. One for the company logo, one for a table showing the packaging details and one for the indicated temperature.
You can select this design on the CMR, so that all logos are displayed on this single form.


Go to the form where you want to insert the logos.

After opening the form, click the "Standard settings" button.

After opening the "Standard settings" screen, you will see the "Place logos" button.
Click this button to view the existing form designs.
You will see a list summary of all the existing designs that relate to the form you previously selected.

Click "New" to create a new design.


As you can see opposite, content has not yet been added to all of the boxes.
The blue information button displays the requirements that apply to a design for the box in question.

NOTE: The designs are JPG files which can be created using Paintbrush and other programs.
Due to the JPG format, the size of the pixels is extremely important. The print quality must be adequate for a professional appearance.


Let us take logo 19 as an example: we want to create a box for indicating the temperature.
This box requires a 3467 x 1029 pixel drawing.


We open Paintbrush and set the format to 3467 x 1029 pixels using Control-E.
The format is generously sized. The screen can be adapted to display the complete logo using Control-PgUp.

Now we are going to start drawing.


The box can be drawn using the maximum line thickness.
Next, we select Arial 200 points as the font.

We can create the design at our own discretion.
A company logo can easily be inserted in the design using this method.

Next, save your design to your local hard disk and note the file name.

Now go to PrintCMR, when you click the white graphics area in box 19.

PrintCMR opens a new screen.
Click the "Edit photo" button. Now select the drawing you have just saved.

After processing, it will be displayed in your design.


Finally, you can select the form design as the standard for your new CMR documents.

You can also indicate whether or not this form design is active for each CMR document.
This makes it possible to print the appropriate CMR with the right layout requirements for different types of cargo.


This video provides detailed instructions: